Packing your gas cooker for a move starts with one critical step: safety.
Moving a gas cooker isn’t as simple as boxing up plates or wrapping furniture. One wrong move, and you could end up with broken burners, gas leaks, or even a cracked glass stovetop. Unlike other appliances, gas stoves require special disassembly, careful packing, and safety checks before transport.
Whether you’re relocating across town or overseas, this guide will walk you through: ✔ Step-by-step packing instructions (including how to protect fragile parts) ✔ Critical safety precautions (avoiding gas leaks & damage) ✔ Professional tips for transporting heavy stoves securely
Let’s start with the most important step—preparing your gas cooker for packing.
Step 1: Safety First – Disconnecting Your Gas Cooker
Before touching anything, shut off the gas supply to prevent leaks or accidents:
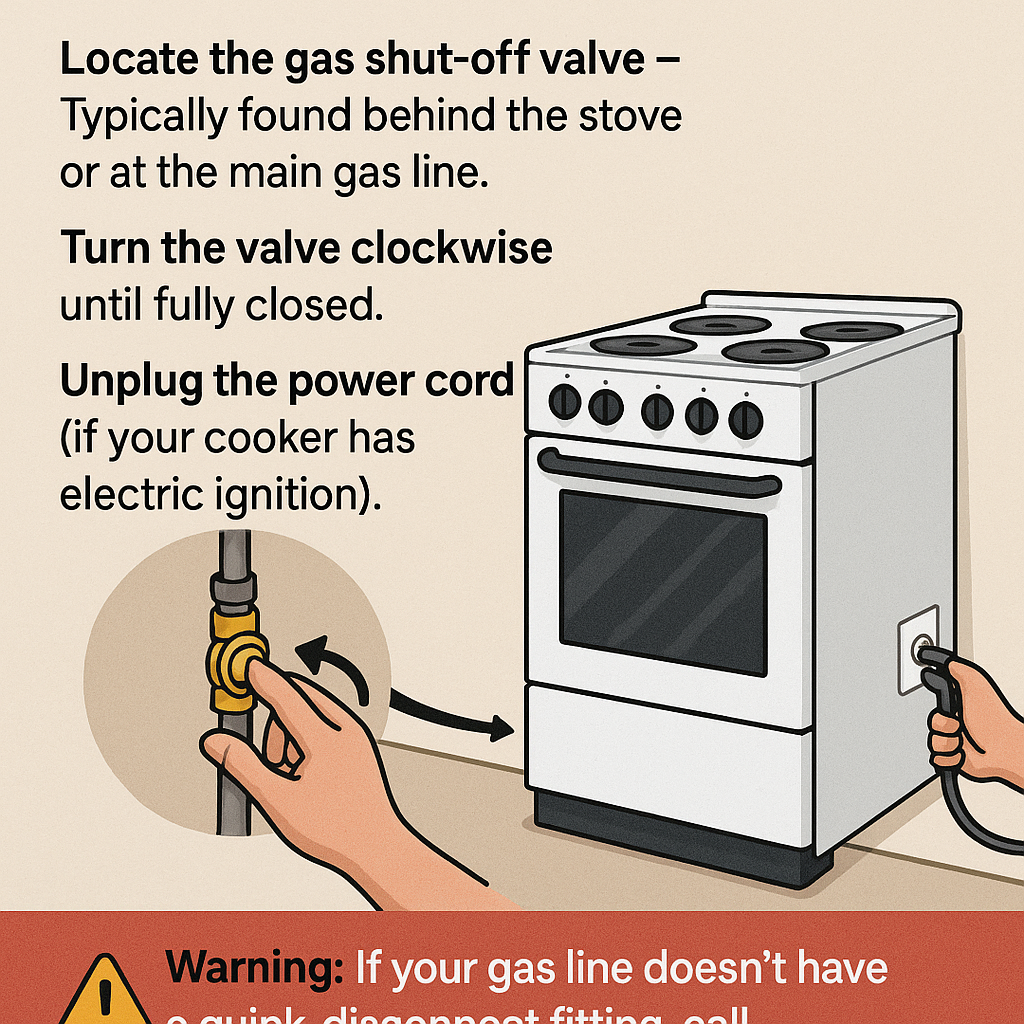
Locate the gas shut-off valve – Typically found behind the stove or at the main gas line.
Turn the valve clockwise until fully closed.
Unplug the power cord (if your cooker has electric ignition).
⚠️ Warning: If your gas line doesn’t have a quick-disconnect fitting, call a licensed technician to safely detach it. Never force connections open.
Step 2: Cleaning & Disassembling Your Cooker
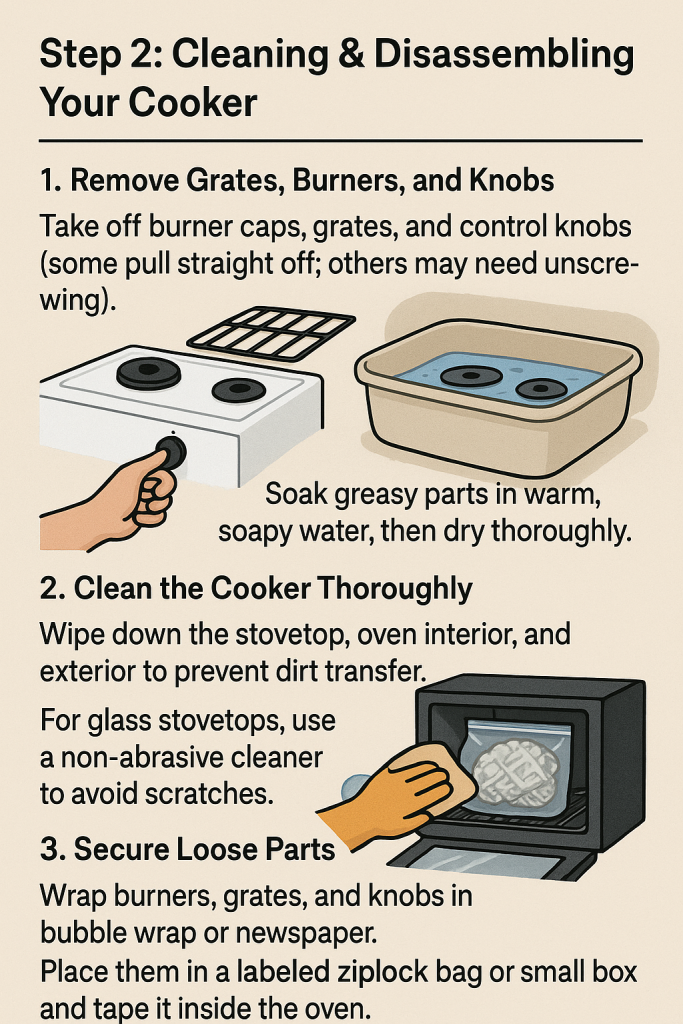
1. Remove Grates, Burners, and Knobs
Take off burner caps, grates, and control knobs (some pull straight off; others may need unscrewing).
Soak greasy parts in warm, soapy water, then dry thoroughly.
2. Clean the Cooker Thoroughly
Wipe down the stovetop, oven interior, and exterior to prevent dirt transfer.
For glass stovetops, use a non-abrasive cleaner to avoid scratches.
3. Secure Loose Parts
Wrap burners, grates, and knobs in bubble wrap or newspaper.
Place them in a labeled ziplock bag or small box and tape it inside the oven.
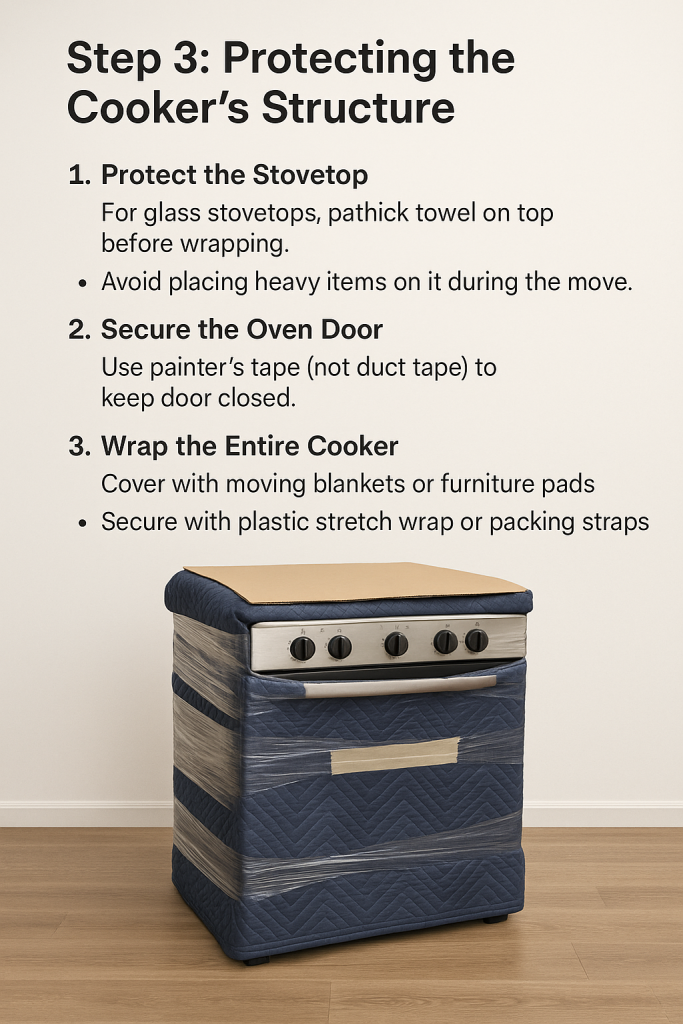
Step 3: Protecting the Cooker’s Structure
1. Protect the Stovetop
For glass stovetops, place cardboard or a thick towel on top before wrapping.
Avoid placing heavy items on it during the move.
2. Secure the Oven Door
Use painter’s tape (not duct tape) to keep the door closed.
If the door has a lock feature, engage it.
3. Wrap the Entire Cooker
Cover the stove with moving blankets or furniture pads.
Secure with plastic stretch wrap or packing straps to keep padding in place.
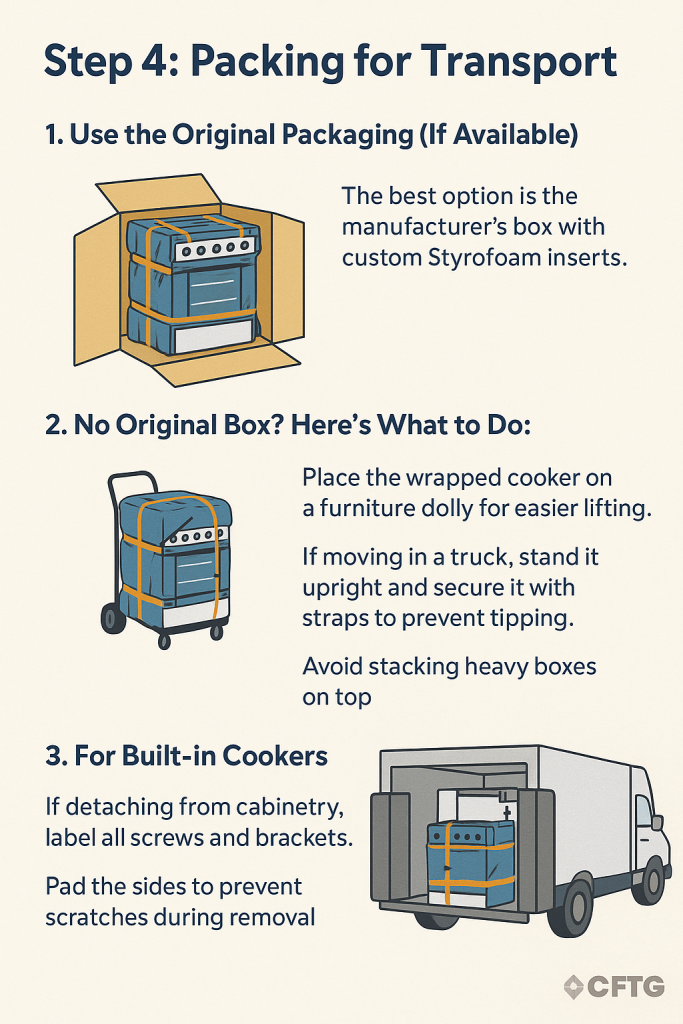
Step 4: Packing for Transport
1. Use the Original Packaging (If Available)
The best option is the manufacturer’s box with custom Styrofoam inserts.
2. No Original Box? Here’s What to Do:
Place the wrapped cooker on a furniture dolly for easier lifting.
If moving in a truck, stand it upright and secure it with straps to prevent tipping.
Avoid stacking heavy boxes on top.
3. For Built-in Cookers
If detaching from cabinetry, label all screws and brackets.
Pad the sides to prevent scratches during removal.
Step 5: Moving Day Tips
1. Transport Upright
Laying a gas cooker on its side can cause gas leaks or damage internal parts.
2. Drive Carefully
Avoid sudden stops or bumps that could jostle the stove.
3. Unloading & Reinstallation
Inspect for damage before reconnecting.
Have a professional reattach the gas line to ensure safety.
Test for leaks with soapy water (bubbles indicate a leak).
Common Mistakes to Avoid
🚫 Skipping the gas disconnection – Always shut off and detach properly.
🚫 Using duct tape on surfaces – Leaves sticky residue; use painter’s tape instead. 🚫 Forgetting to secure the oven door – It can swing open and break during transit. 🚫 Stacking heavy items on the stove – Can crack glass or dent the surface.
Final Thoughts
Packing a gas cooker isn’t just about throwing it in a truck—it’s about safety, protection, and proper handling. By disassembling, wrapping, and securing it correctly, you’ll ensure a smooth move and a fully functional stove in your new home.
Alternatively, you could call us on 0795333555 for a smoother moving experience